

Probably the most eco-friendly concepts towards sustainable dwelling is making beeswax wraps. Now not best is it a large number of a laugh, it is usually an funding in a greener long run with much less plastic. On this information, I display you how you can make reusable beeswax wraps of prime quality that can be utilized for lots of functions. There are a number of alternative ways to cause them to, this recipe is my favourite – it is extremely easy and does no longer contain a large number of other fabrics.
I really like making issues with beeswax – why? Neatly, I’m a beekeeper so I’ve a non-public dating with this herbal wax. Additionally, there are such a large amount of tactics to make use of beeswax that it suits into a lot of my crafting needs.
Create Your Personal Beeswax Meals Wraps
Making issues to make use of in your house isn’t as exhausting as you might imagine. If you’ll be able to soften beeswax and use a small paint brush – you’re not off course.
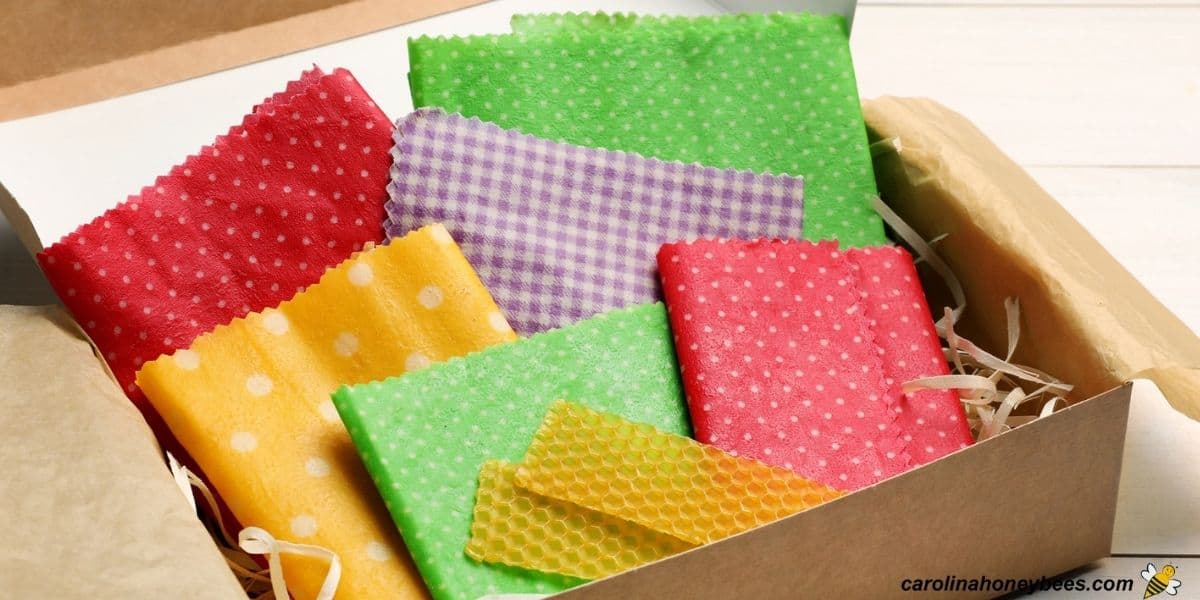
Beeswax wrappers have received reputation for shielding meals. They’re an excellent useful resource for this yet they may be able to be utilized in different ways too. Nearly anything else that wishes coverage from moisture or grime will also be positioned within.
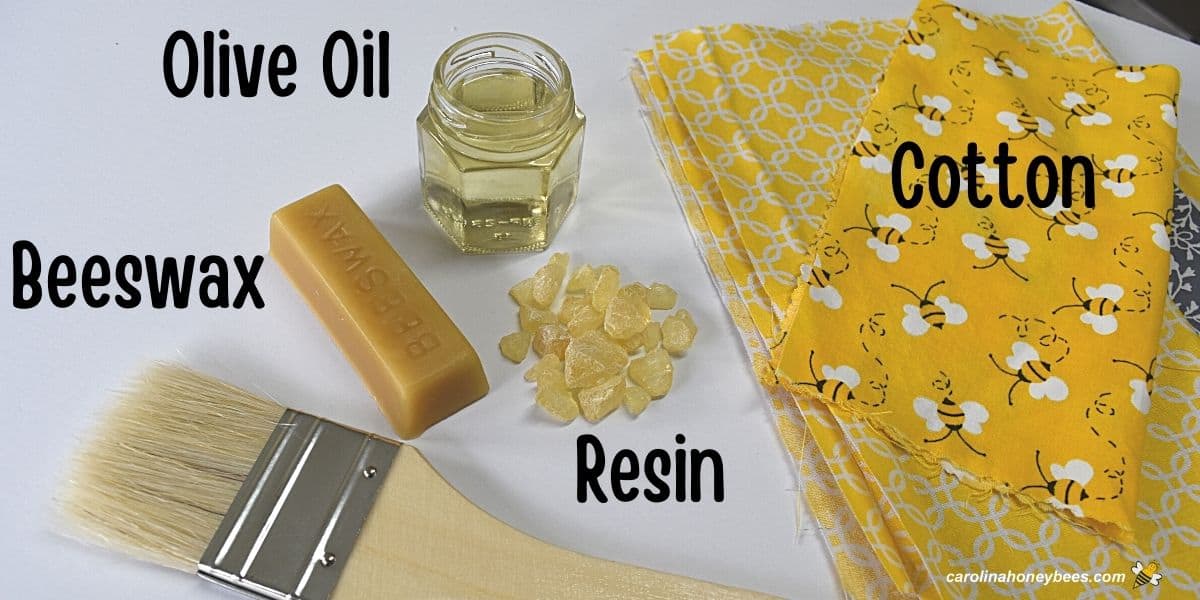
Fabrics Wanted
- beeswax
- olive oil
- pine resin
- cotton material
Beeswax
As a result of this wax comes from bees, this is a herbal and renewable useful resource. And through making the most of its adhesive houses it really works smartly on this challenge.
Beeswax is in the stores in many alternative paperwork. Wax pastilles or beeswax pellets are simple to measure and soften yet they do price extra consistent with ounce.
Uncooked wax in block shape works really well. In the event you use wax from your personal hives or purchase from a beekeeper – be certain the beeswax is wiped clean.
Olive Oil
You are going to best use a little bit of olive oil on this instructional. It is helping to loosen the wax and resin aggregate.
Resin
This recipe for beeswax wraps makes use of resin. You best desire a small quantity and leftover resin will retailer smartly in a sealed container for a very long time.
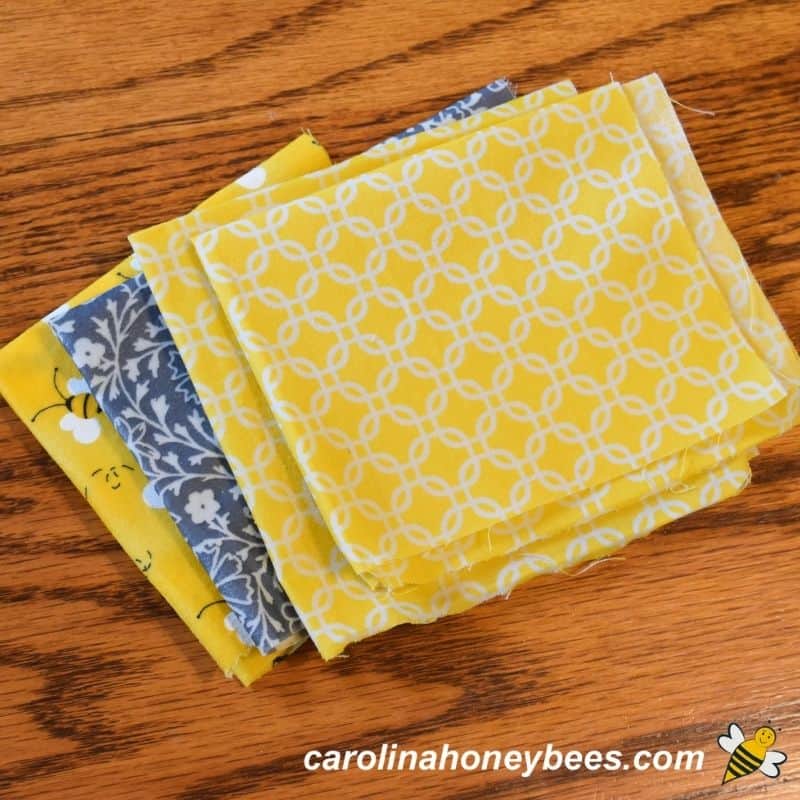
Cotton Fabric Items
Skinny cotton generally offers the most productive effects when making beeswax wraps. Sheeting subject matter or cotton quilting squares are just right alternatives. Some folks purchase natural cotton cloth – that may be a private choice.
Your material squares will have to be washed and dried previous to starting. They may be able to be reduce to any dimension yet 10” – 12” is maximum commonplace. You could need to make other sizes to deal with more than a few bowl sizes.
When you have particular scissors known as pinking shears, those will give your material a sassy edging and cut back fraying. However, common scissor cuts are ok.
Why Use Resin?
Dried chunks of pine resin (pine rosin) are repeatedly utilized in making beeswax wraps. They’re exact chunks of tree resin which were wiped clean and dried. That is what is helping give the wraps may just dangle.
Alternatively, some folks don’t wish to use resin. They make a choice a recipe that requires jojoba or coconut oil as a substitute of resins. This too generally is a workable answer.
Alternatively, if an excessive amount of oil is used within the recipe (and right here once more it’s important to experiment) issues can rise up.
From time to time the wrap fails to dangle to the bowl and now and again it leaves in the back of bits of coconut oil residue. The selection is yours – in all probability take a look at each and notice which you favor easiest?
Apparatus & Equipment
Minimum gear are had to make beeswax wraps past fundamental craft gear:
- get entry to to an oven
- double boiler and a warmth supply to soften the wax
- aluminum foil
- baking sheet
- small paint brush
Step through Step Procedure

1. Safely soften your beeswax in double boiler arrange. One of the vital most secure crafting elements, beeswax will flame if over-heated. Soften slowly with consistent supervision.
2. Whilst the beeswax is melting, overwhelm resin chunks into an influence and blend with a little bit of olive oil. Upload this to the recent beeswax and stir regularly till the resin is melted.
3. Line a baking sheet with aluminum foil and preheat your oven to 175° F. Position dry material at the pan and heat it within the oven for two mins. That is simply to get the fabric heat and able to soak up the mix.
4. Use a broom to use a gentle coat of the beeswax/resin aggregate to at least one aspect of your material. Position again within the oven for 4 mins.

5. Whilst you take away the diy beeswax wrap from the oven, glance at the again aspect. It will have to glance darkish and rainy – appearing that the wax has been absorbed into the fabric.
In the event you realize any gentle colour or dry spots – brush a little bit extra wax on the ones spaces and put the fabric again within the oven for 1-2 mins.
6. Take away from oven and use tongs (or an identical) to pick out up the fabric through 2 corners. Fan it gently within the air for a minute or to be able to get started the beeswax cooling – then lay flat on any other piece of aluminum foil to chill.
Professional Guidelines
There are lots of recipes to imagine in making diy beeswax wraps. It may be a little bit overwhelming. Which one is the most productive?
In the long run it is important to experiment- as a result of every recipe has more than a few ranges of “dangle” relying at the precise components used.
Those who have extra dangle is also a little bit sticky in heat climate. You need to come to a decision which qualities are maximum vital to you and regulate the factor ratio from there. Humidity and temperatures can impact how smartly the tip product works.
Troubleshooting
In the event you reside the place it’s sizzling and humid, you could want a little bit extra oil or resin. Other folks in chilly climates would possibly use much less. It’s actually an issue of private choice after you purchased a workable product.
Here’s a tip to bear in mind if you find yourself making your first beeswax wraps. Don’t make a large number of them in your first try. The advent procedure is a laugh. Simply be ready for a little bit of recipe tweaking.
The usage of a double boiler is the most secure approach to soften beeswax. It will probably turn out to be overheated and purpose a fireplace.
If you select to make use of the microwave, use brief bursts of time and don’t go away it unattended. Differently, you can be left with a large mess to wash up.

Find out how to Use
As soon as the fabric has cooled, it is able to use. Position it on best of a bowl, and gently shape a seal through urgent down across the edge. Paintings slowly as the warmth of your hand is helping melt the wax.
This paperwork a herbal seal similar to dangle wrap or common plastic wrap. Naturally, no longer each meals garage job is appropriate for those reusable wraps. Don’t use them for meats, uncooked or cooked, or issues which can be gooey.
You’ll form them into snack baggage through stitching on a button. Or use them to wrap a sandwich or a block of cheese.
A favourite manner to make use of them within the kitchen is as easy bowl covers. They keep very blank, and but stay mud and (nosy cat noses) out of items I’ve left at the counter.
They may be able to be gently wiped clean with a moist material, chilly water and gentle dish cleaning soap. However, for those who wash them continuously, you’ll have to reapply your wax aggregate faster. Sure, you’ll be able to refresh older ones. Additionally, don’t use sizzling water to wash your do-it-yourself wraps.
FAQs
The usage of wax by myself to make meals wraps can paintings to a degree-but it isn’t excellent. You are going to have cracking when in fact the usage of them on anything else. Additionally, it’ll be slightly stiff when cool and no longer as pliable.
The most typical dimension for DIY beeswax wraps is 10″ – 12″ sq. – yet after all you’ll be able to cause them to any dimension you would like.
After some time, (how lengthy depends upon many elements), your beeswax wraps will wish to be replenished.
This will also be so simple as reapplying the beeswax, resin aggregate yet this is a upkeep job to imagine.
Extra Concepts
Make some do-it-yourself beeswax wraps for presents the usage of subject matter associated with the recipient’s pursuits. For academics, make a choice material with faculty designs.
When you have a favourite track teacher, material with notes could be cool. Use cloth with bees and make an overly, particular bee reward for a brand new beekeeper.
Now, when you have a little bit of wax left over… listed below are a few actually neat small initiatives.
Check out some beeswax wax melts or natural beeswax sachets to clean up your house. They’re all herbal and shortage probably the most gnarly chemical substances you to find in different merchandise.
Or any other cool thought for the kitchen – take a look at some beeswax spoon butter to make use of for rejuvenating your wood put on. It makes nice affordable presents too. A brand new wooden spoon set and a jar of do-it-yourself spoon butter – sure please!
Ultimate Ideas
The method to make beeswax wraps sounds so easy – and it’s to some extent. After I made my first ones, I assumed why no longer simply brush the wax on my material. Neatly, that didn’t paintings smartly. After the wax cools, it cracked once I formed the fabric.
It is a very inventive herbal craft challenge. I imply – we’re the usage of uncooked beeswax and pine resin – you’ll be able to’t get a lot more herbal that that!
And, if you wish to actually get into your inventive vibe – use other colours of cotton cloth to check your kitchen décor or that of a chum.
Suggestions
This publish would possibly include associate hyperlinks. As an Amazon Affiliate, I earn from qualifying purchases. Please learn my disclosure.
Beeswax Wraps Recipe Educational
Easy directions that display you how you can make your personal beeswax wraps. All herbal and reusable, those meals wraps are an effective way to cut back the usage of throw away plastic.
This publish would possibly include associate hyperlinks. As an Amazon Affiliate, I earn from qualifying purchases.
- 4 items cotton material squares reduce to desired dimension – 10″-12″ maximum commonplace
- 50 grams beeswax
- 10 grams pine resin
- 1.5 teaspoons olive oil
-
Measure beeswax through weight and position in a double boiler insert. I all the time use weight (through grams) to measure fabrics when the usage of my beeswax recipes. You could acquire beeswax pastilles. They’re simple to paintings with and measure.Alternatively, if you are going to buy a block of uncooked wax from a space beekeeper, it’s simple to wreck into chunks as smartly.
-
Measure and grind pine resin crystals. Resin is helping make the cloths reasonably sticky. In the event that they finally end up being “stickier” than you favor, use much less resin subsequent time.The chunks of resin will soften within the beeswax yet very slowly. For sooner melting, wrap the pine resin chunks in a fabric and beat them with a hammer.This may increasingly cut back the resin to powder shape for sooner melting. Pour resin into the melting beeswax and stir smartly.
-
Now we’re able so as to add a little bit of oil. I exploit Olive Oil as a result of that’s what I’ve readily available. Different crafters revel in the usage of Jojoba oil and even coconut oil. Measure and pour the oil into the melting pot. Stay the warmth at a medium to low degree and proceed to slowly warmth the mix till the whole thing is liquid. Stir smartly because the pine resin will generally tend to clump on the backside. When all is melted and blended smartly, it’s time for your next step.
-
Preheat your oven to 175 ° F.Line a flat baking sheet pan or cookie sheet with aluminum foil. Position a fabric sq. at the pan and position within the oven for two mins.Warming the fabric is helping it soak up the melted beeswax aggregate. The warmth of the pan prevents the wax from cooling too temporarily. After 2 mins, take away from oven – the usage of an oven mitten.
-
Brush Beeswax Aggregate on FabricPosition the nice and cozy pan on a warmth secure floor that you’ve got coated with aluminum foil. (for simple blank up).Use your brush to paint a gentle coat of your recipe at the material. Don’t put an excessive amount of, we best need simply sufficient to coat the outside. Best paint one aspect.
-
Position your pan (and material) again within the oven for 4 mins. Then, take away and sparsely elevate up the threshold of the fabric.Does it glance rainy or darkish at the again? If no longer, evenly brush extra of your aggregate at the spots that glance dry and position again within the oven for a minute or two.If the again of the fabric appears damp and saturated, it has sufficient wax. The usage of tongs or your hands if no longer too sizzling, elevate the fabric instantly up through 2 corners.Gently fan it within the air for a minute or two. The beeswax will set temporarily. Then you’ll be able to lay the beeswax wrap down flat on a work of aluminum foil to permit it to chill.
Make a pair first to experiment with the precise factor ratio most well-liked. In the event you to find them too stick, use much less pine resin within the subsequent batch.